Introduction
Annotation guidelines are the foundation of any data annotation project. They define what should be annotated, how it should be annotated, and how annotators should handle the many situations that arise when working with production data.
Yet, after working on dozens of annotation projects, we have found that the quality of annotation guidelines varies considerably.
Some clients provide exceptionally clear, structured, and comprehensive documentation. Others provide guidelines that leave significant room for interpretation. We have seen guidelines with no examples, guidelines where exceptions are scattered throughout the document, and instructions written in ways that make them unnecessarily difficult to apply.
When this happens, a significant portion of the project’s early stages is spent clarifying requirements rather than annotating data.
In many cases, we end up creating our own internal guidelines based on project discussions, annotator questions, and decisions made during the initial project phase.
So what makes an annotation guide effective?
Why Annotation Guidelines Matter
When annotation quality issues appear, the immediate assumption is often that annotators need more training or that additional review is required.
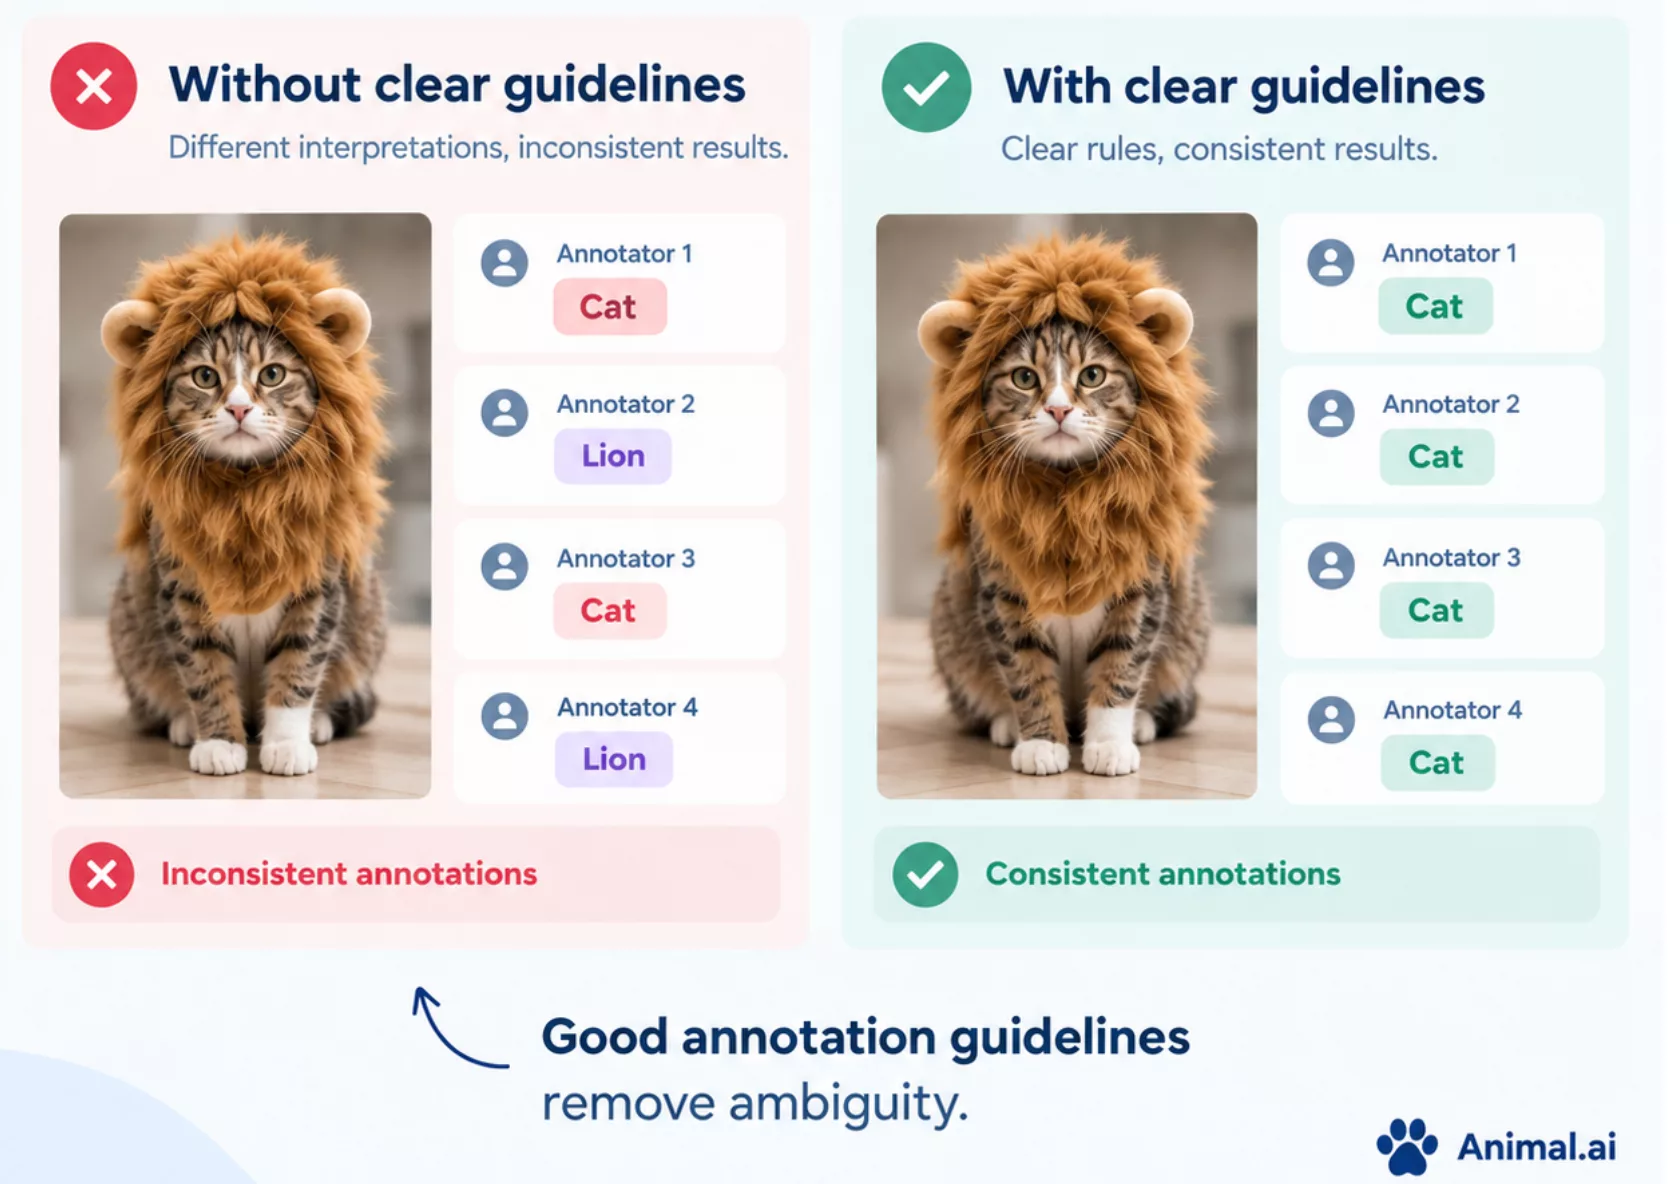
However, inconsistent annotations frequently originate from ambiguous instructions rather than from the annotators themselves. If two experienced annotators can reasonably interpret a rule differently, inconsistency is almost inevitable.
Good annotation guidelines help ensure that every annotator makes the same decision when faced with the same situation. They reduce uncertainty, accelerate onboarding, simplify reviews, and help ensure consistency across the entire dataset.
1. Start With the Project Objective
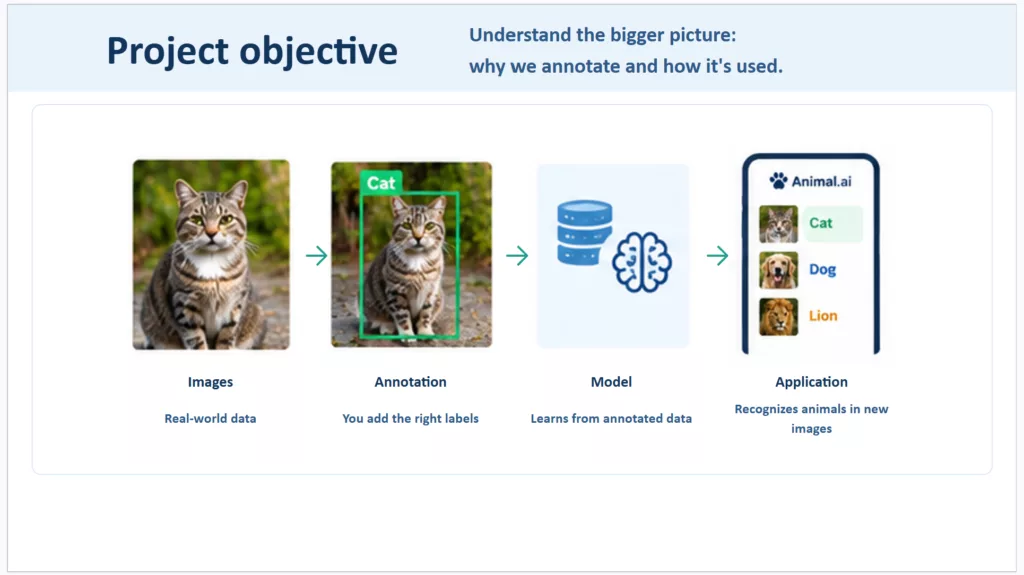
At the beginning of a project, we like to provide enough context for annotators to understand the role their annotations play in the overall process.
They do not need to know every technical detail of the final system (which is often confidential), but they should understand:
- The objective of the project
- How the annotated data will be used
- What information is important to capture
A project objective section is not only useful for explaining the task. It also helps annotators understand their role within the broader project and the importance of the decisions they make throughout the annotation process.
In our experience, annotators tend to be more engaged when they understand the purpose and impact of their work.
This section typically includes one or two representative examples that help illustrate the project’s objectives and provide annotators with a concrete understanding of the task ahead.
2. Describe the Annotation Technique
The next step is to explain the annotation method itself that will be used.
Depending on the project, this may involve:
- Bounding boxes
- Polygons
- Semantic segmentation
- Instance segmentation
- Keypoints
- Classification
This section should describe what the annotation should represent and how it should be created, using examples that illustrate the most common situations found in the dataset.
It is also an opportunity to familiarize annotators with the client’s data and provide concrete examples of the expected output before production begins.
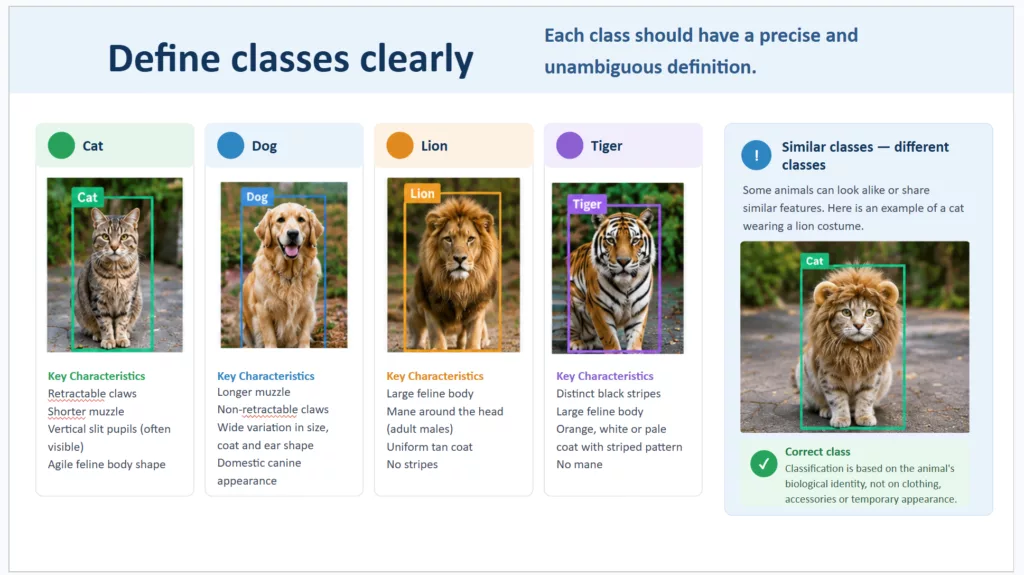
3. Define Classes Clearly
Each class should have a precise and unambiguous definition.
For every class, the guidelines should explain:
- What should be annotated
- What should not be annotated
- How the class differs from similar classes
- Typical examples
Consistent terminology is essential. The same object or concept should not be described using different terms throughout the document.
Whenever possible, include visual examples. A single image can often communicate a rule more effectively than several paragraphs of text.
4. Define Clear, Precise, and Complete Annotation Rules
This section is the heart of the annotation guide.
In our experience, good annotation rules share three important characteristics:
Clarity
Rules should be written in simple, direct language. Avoid ambiguous wording, unnecessary complexity, double negatives, and long paragraphs containing multiple conditions and exceptions.
The objective is not simply to make the rule correct. It is to make the expected decision easy to understand and reproduce consistently.
When a rule requires several successive decisions, a decision tree can often be more effective than a long textual explanation.
Decision Trees Can Help
Decision trees are particularly useful when:
- Multiple conditions must be checked in sequence
- Rules contain several exceptions
- Similar decisions occur repeatedly
- Misinterpreting one condition can lead to an incorrect annotation
They also provide a useful way to test the quality of the guidelines themselves. If a rule cannot easily be translated into a decision tree, it may indicate that the rule is still ambiguous or incomplete.
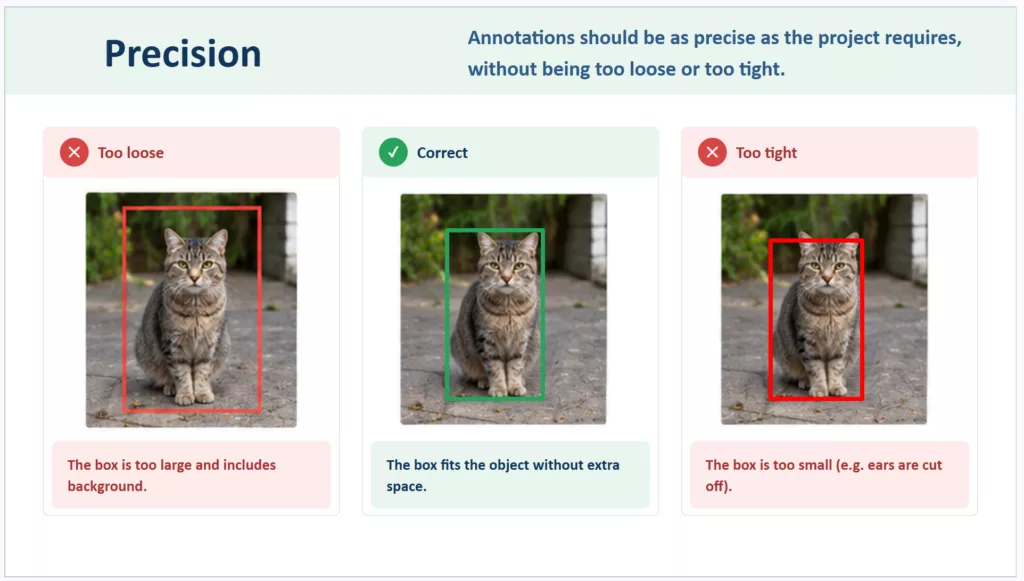
Precision
One of the most common topics discussed during project calibration is the expected level of annotation geometric precision. This is often a critical decision, as it can have a significant impact on both project duration and overall workload.
Annotators need to know exactly how precise their annotations should be. In practice, a relatively small increase in the required level of detail can sometimes result in a disproportionately large increase in annotation time.
The goal is therefore not to maximize precision at all costs, but to define the level of precision that is actually required by the project’s objectives (see our article about precision versus performance).
Questions that should be answered include:
- How closely should a polygon follow an object’s boundaries?
- Should small protrusions be included?
- Should tiny holes or gaps be represented?
- What level of deviation is acceptable?
- When is an annotation considered sufficiently accurate?
Not every project requires the highest possible level of precision.
For some use cases, a few pixels of deviation may have no practical impact. For others, precise boundaries may be critical.
A good annotation guide clearly defines the level of precision required by the project rather than simply asking annotators to be “as precise as possible.”
Completeness
Perhaps the most overlooked aspect of annotation guidelines is completeness.
Many guides describe the most common situations but fail to address the cases that actually generate questions during production.
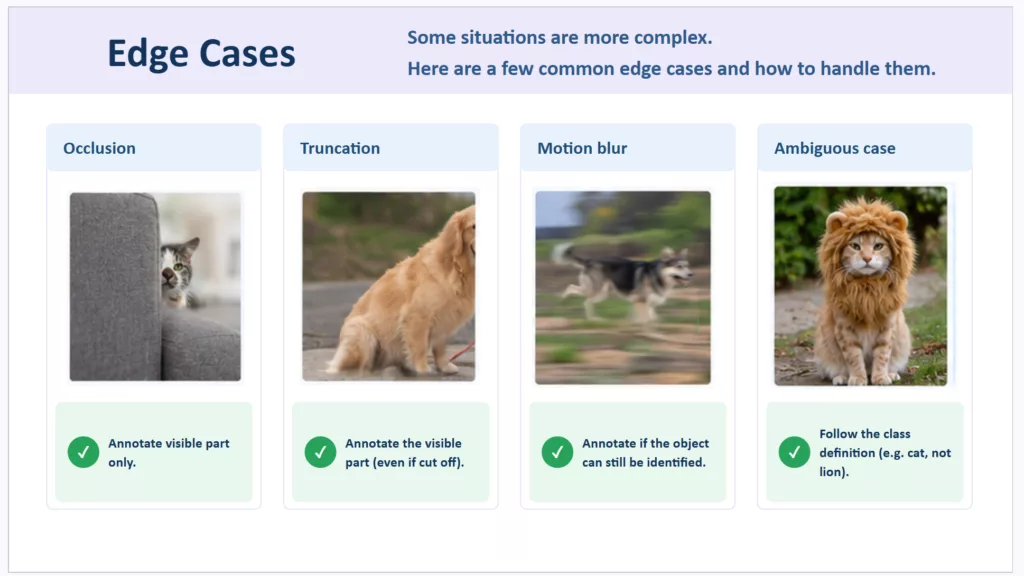
Annotators should not have to guess what to do when they encounter:
- Partially visible objects
- Occlusions
- Overlapping objects
- Truncated objects
- Motion blur
- Low-quality images
- Ambiguous cases
A good annotation guide should anticipate the situations annotators are likely to encounter and define how they should be handled.
Whenever possible, these situations should be illustrated with concrete examples from the dataset.
A useful structure is:
General Rule → Exception → Edge Case
Start with the rule that applies most of the time, then clearly document when it does not apply. More specific or unusual situations can then be documented separately as edge cases, with a clear explanation and, whenever possible, a visual example.
5. Document Edge Cases and Exceptions
Edge cases deserve their own section because they are often responsible for a large proportion of annotation questions.
No matter how carefully a guide is written, annotators will eventually encounter situations that do not fit exactly into the general rules.
For each important edge case, we recommend documenting:
- The situation
- The expected annotation
- A visual example
- A short explanation of the reasoning
Real examples taken from the dataset are generally more useful than artificial examples because they reflect the situations annotators will encounter in production.
6. Define How to Handle Pre-Annotations
When pre-annotations are provided, the guidelines should clearly explain how annotators are expected to use them.
This section typically describes the overall quality of the pre-annotations and sets clear expectations about what should be reviewed or modified. For example, the guidelines may specify:
- Which types of errors are commonly found in the pre-annotations
- Which elements should normally be corrected
- Which elements can be left as they are
- When a pre-annotation should be deleted or replaced
- What to do when an expected pre-annotation is missing
- Whether classes, geometries, or attributes should be systematically checked
It is also important to make clear whether pre-annotations should be treated as a starting point or as annotations that are expected to be systematically reviewed.
The level of correction required should be adapted to the quality of the pre-annotations and the objectives of the project. This can have a significant impact on annotation time and should therefore be clearly defined from the start.
7. Explain the Annotation Workflow in the Tool
Once the annotation rules have been defined, the guide can explain how they should be applied in the annotation platform.
In practice, this section is often relatively short. Annotation teams are usually already familiar with the tools they use on a daily basis, so there is little value in repeating extensive tool documentation in every project guide.
Instead, we typically focus on project-specific instructions and tips, such as:
- Particular tool features to use
- Project-specific workflows
- Whether AI-assisted annotation features (such as SAM) should be used (see our article about SAM in data annotation: when and how to use it)
- Shortcuts that can improve efficiency
- Common mistakes to avoid
- Any client-specific requirements related to the platform
The goal is to highlight the information that is unique to the project rather than reproduce the tool’s user manual.
Annotation Guidelines Are Living Documents
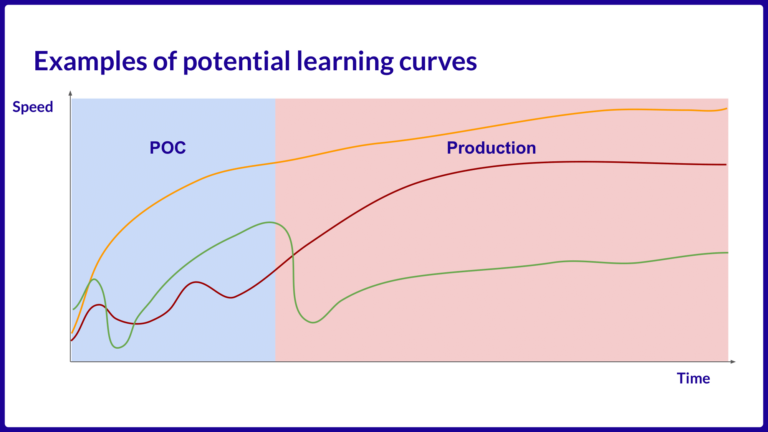
One common misconception is that annotation guidelines should be finalized before production begins. In reality, even the best-prepared guide will not cover every situation from day one. As annotators start working on real data, they inevitably encounter situations that were not anticipated during project preparation. These questions are valuable. If the same question is raised repeatedly, it often indicates that the guidelines need to be improved.
Recurring questions may reveal:
- A missing rule
- An unclear definition
- An undocumented edge case
- A need for additional examples
For this reason, we consider annotation guidelines to be living documents that evolve throughout the calibration phase and, when necessary, during production.
Over time, the guide becomes a more complete representation of the decisions required by the dataset.
A Practical Structure for an Annotation Guide
Based on our experience, a practical annotation guide often follows this structure:
- Project Objectives
- Annotation Technique
- Classes and Definitions
- Annotation Rules
- Edge Cases and Exceptions
- Pre-annotations (if applicable)
- Annotation Workflow in the Tool
The exact structure will vary from project to project, but the underlying principle remains the same: define what should be annotated, explain how decisions should be made, anticipate difficult situations, and only then explain how to perform the task in the annotation platform.
Conclusion
Writing effective annotation guidelines is about reducing ambiguity. The best annotation guides are:
- Clear enough to be understood quickly
- Precise enough to define the expected level of detail
- Complete enough to cover real-world situations
- Rich in visual examples
- Continuously improved based on feedback from annotators
Most importantly, a good annotation guide should not only describe what to do in the most common situations. It should help different annotators make the same decision every time, including when the answer is not immediately obvious.
The less room there is for interpretation, the easier it becomes to produce consistent annotations across people, batches, and time.
Starting a new annotation project and not sure where to begin with your guidelines? Our team supports dozens of annotation projects every year, let’s talk about what your project actually needs. Contact us to discuss.